GUI
GUI
The GUI is a user-friendly interface that allows users to configure and interact with the olfactometer. It is a useful tool for debugging and initial system setup, compatible with additional hardware and software control options.
This section provides an overview of the GUI and describes how to use it.
Installation
Go to the Releases page of the official GitHub repository and download the release with a tag starting with app that corresponds to the GUI for your operating system.
Releases with tags starting with fw are for the firmware and are not applicable for the GUI.
Currently there are x64 builds for Windows, Linux and MacOS (both Intel and Apple Silicon).
On Windows, the GUI has an installer that will install the application and create a shortcut on the Start Menu. On Linux, the GUI is distributed as a .tar.gz file that can be extracted and run from any location and on MacOS, the GUI is distributed as a .zip file that can be extracted and run from any location.
GUI Description
The GUI is divided into the following sections:
- Device connection
- Flow
- Configuration
- Save
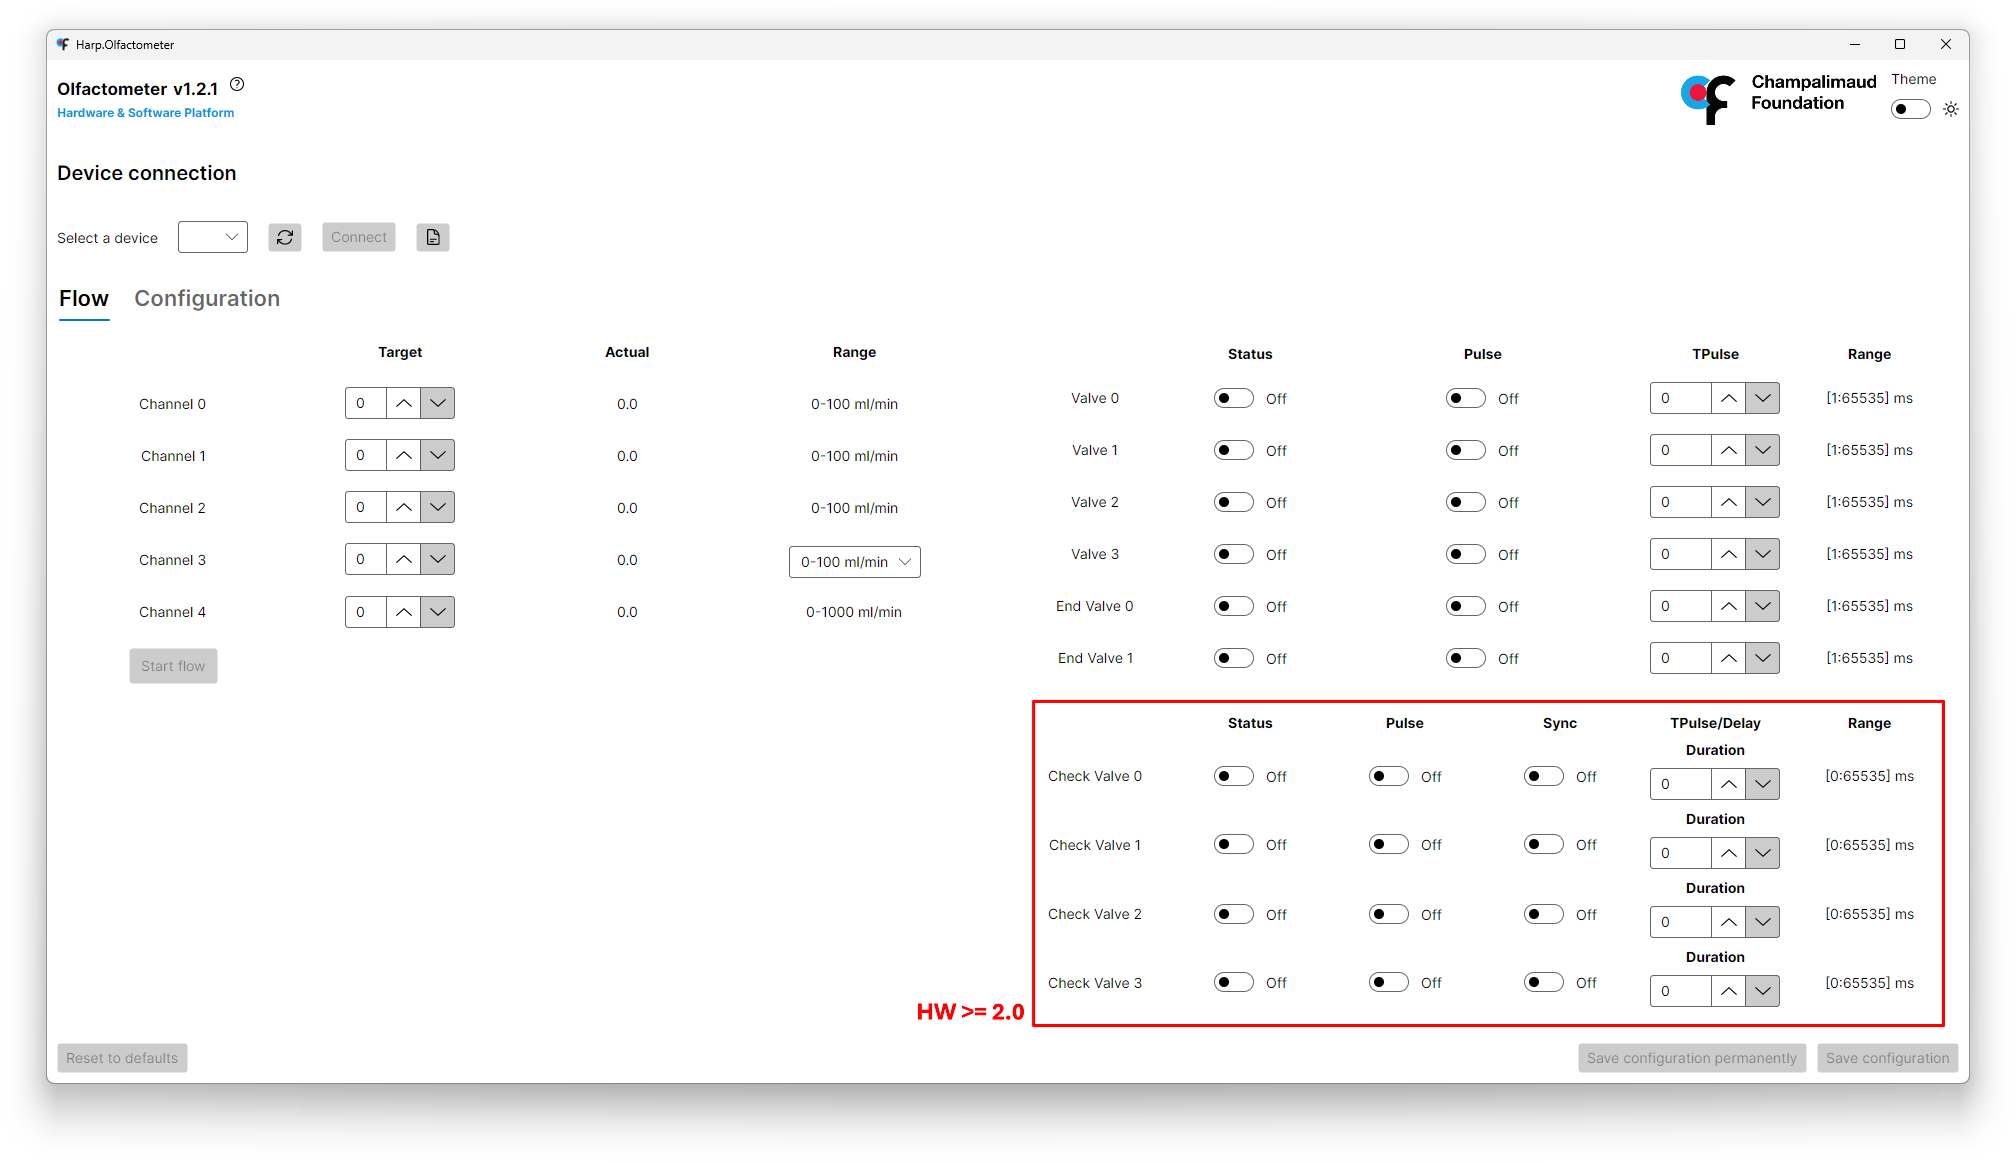
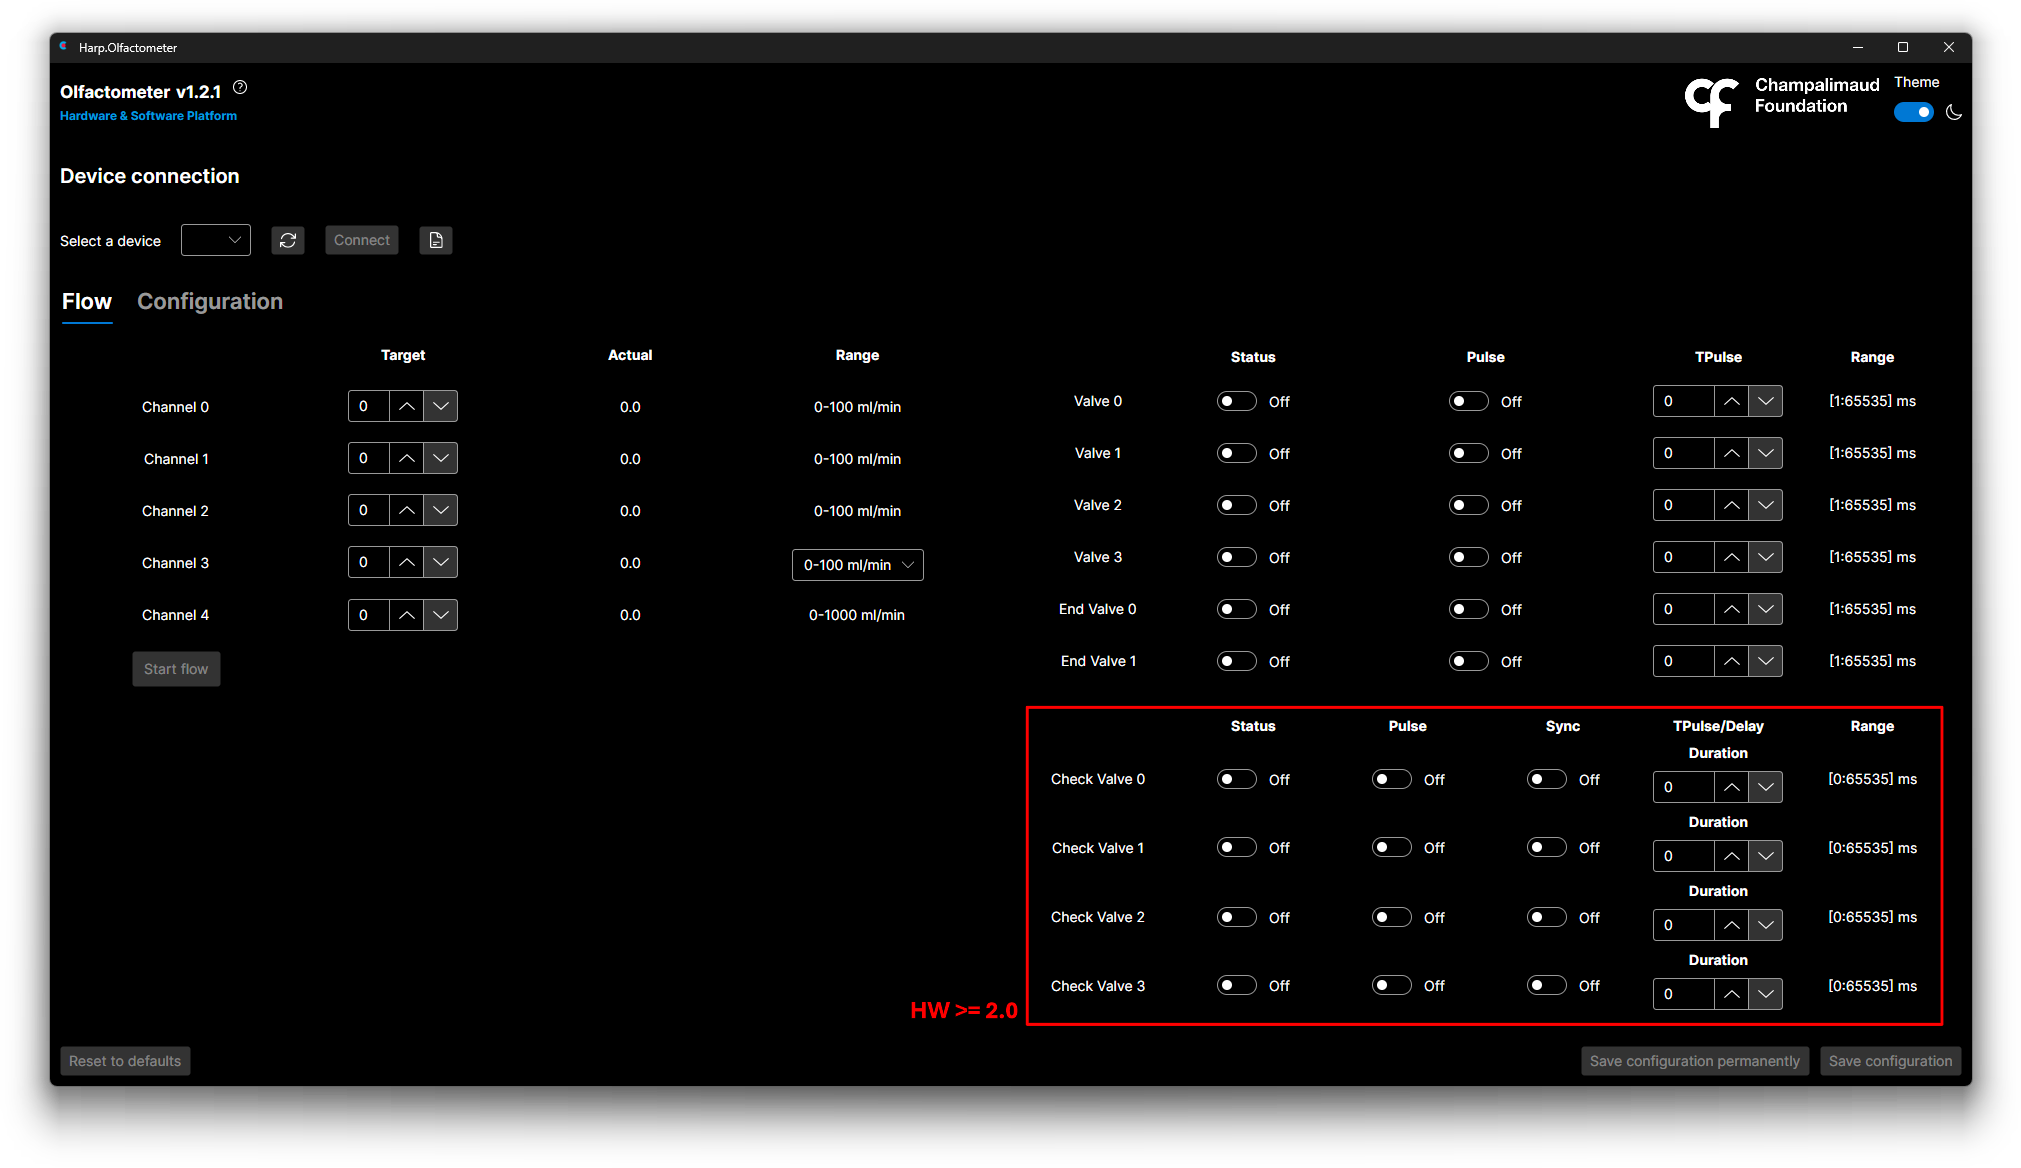
When connecting a device with Hardware >= 2.0, the GUI will show the additional section marked in the image above. More details on usage regarding the options available in this section can be found under the Check Valves and Pulse Mode registers.
Device Connection
This section allows you to connect to the olfactometer. You can select the COM port and click the Connect button to establish a connection. There is also a Refresh button that will refresh the list of available COM ports. Once connected, the Connect button will change to Disconnect.
Flow
This section allows you to control the flow of air through the olfactometer. You can set the target flow. The current flow rate is displayed in the Actual column. For channel 3, you can also set the range from 0-100 mL/min to 0-1000 mL/min.
Furthermore, you can start the flow by clicking the Start flow button. Once pressed, the button will change to Stop flow and the flow will start. You can stop the flow by clicking the Stop flow button.
On this section, you can also open or close the valves by clicking the corresponding switch on the Status column.
Configuration
The configuration section can be seen in the image below:
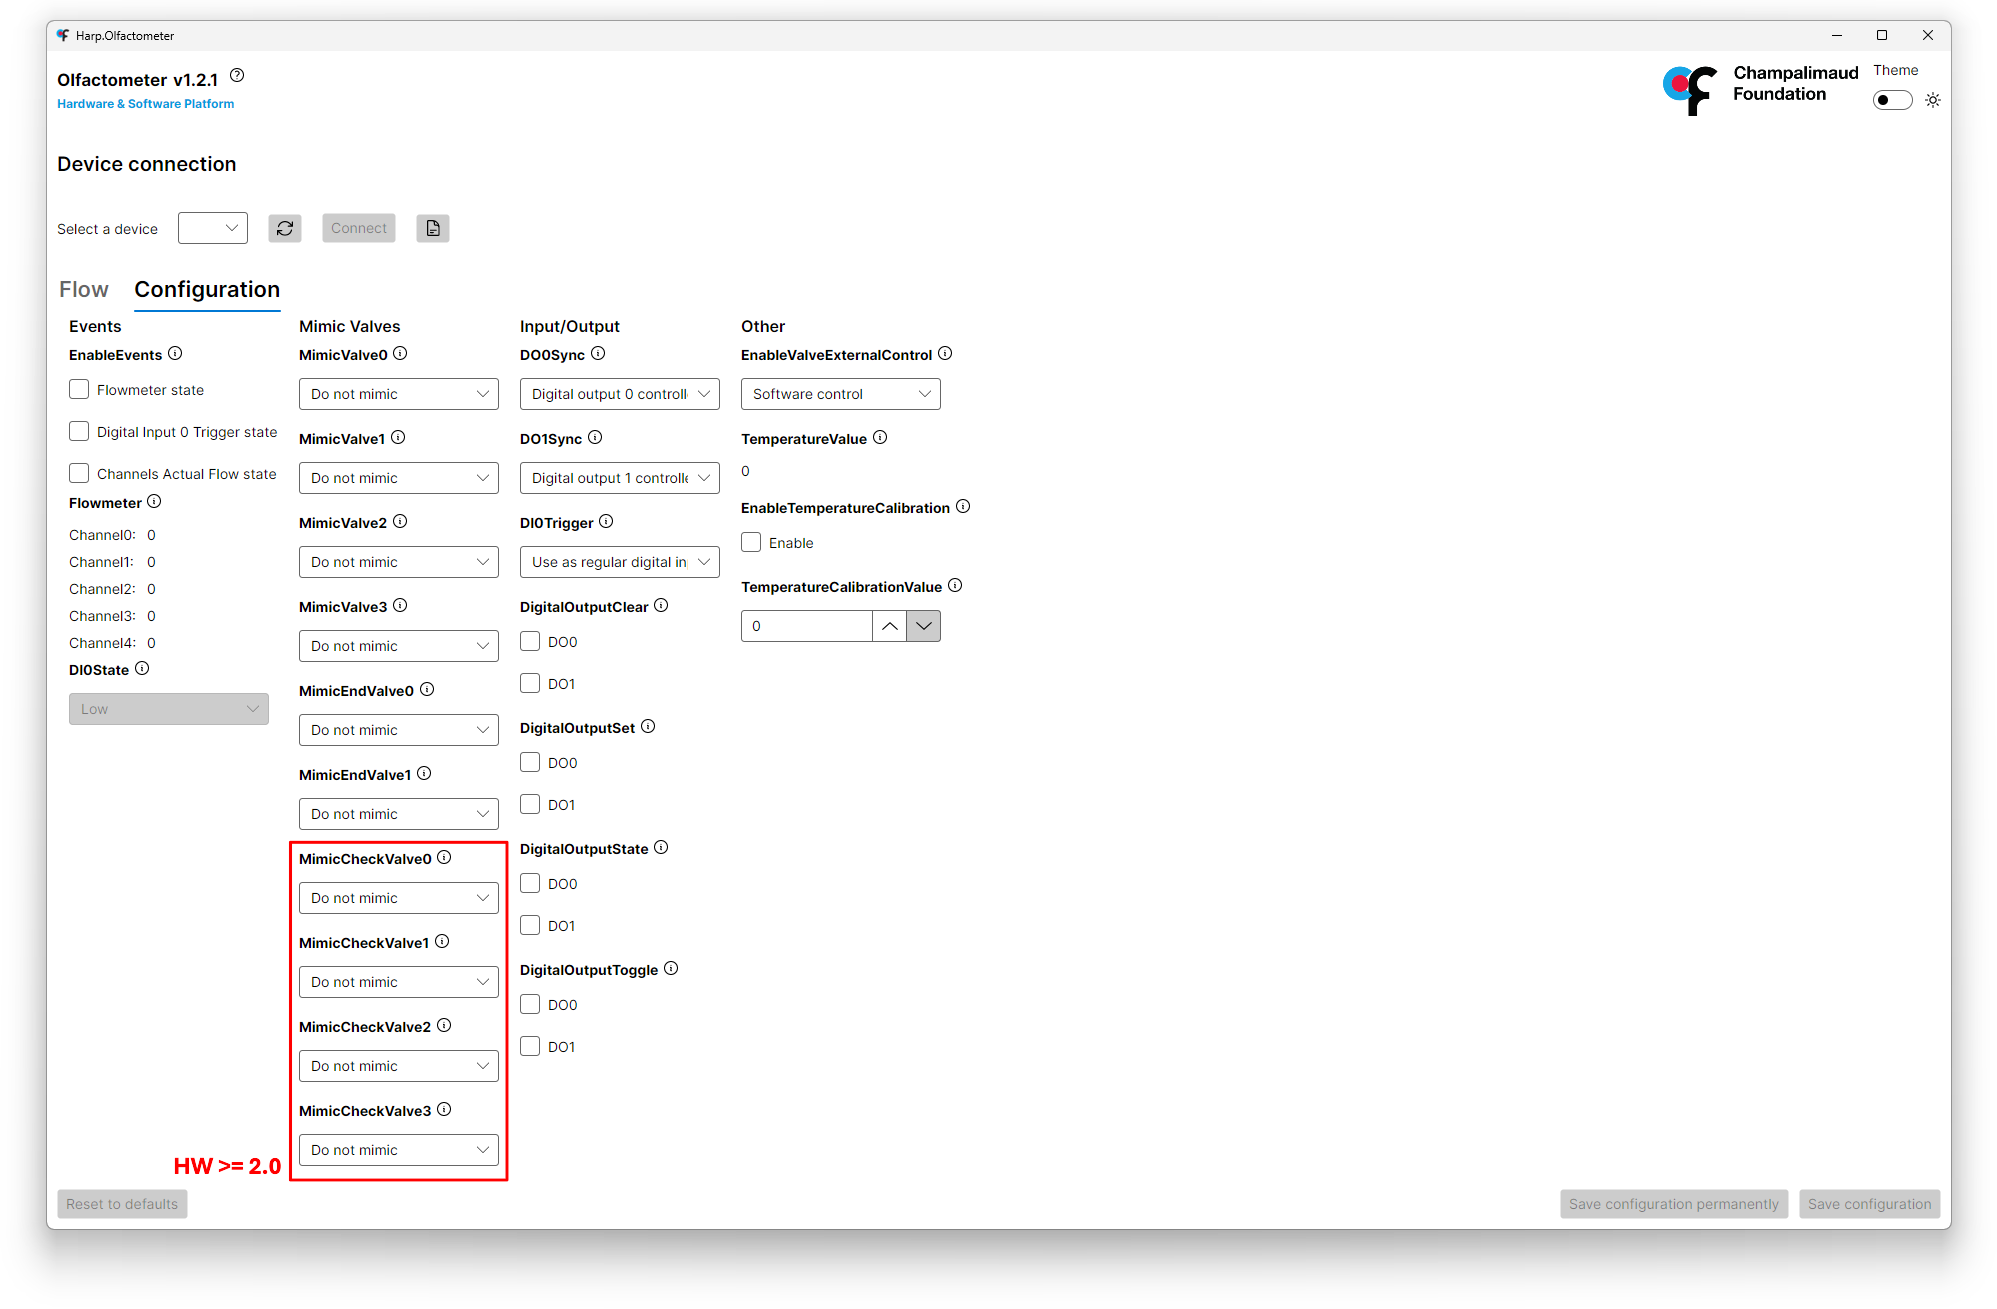

The configuration is divided into the following sections:
- Events
- Mimic Valves
- Input/Output
- Other
When connecting a device with Hardware >= 2.0, the GUI will show the additional section marked in the image above. More details on usage regarding the options available in this section can be found under the Check Valves registers.
Events
This section allows you to configure the events that will be triggered by the olfactometer. You can activate or deactivate the events by clicking the corresponding checkbox.
Mimic Valves
This sections allows you to configure mimicked output behavior to the digital outputs. You can set the combobox value for Valve 0 to Mimic to Digital Output 0 or Mimic to Digital Output 1, for example.
Input/Output
This section allows you to configure the input and output behavior of the olfactometer. You can set Digital Output 0 and Digital Output 1 to be either Controlled by software or to mimic Enable Flow register.
For the Digital Input 1, you can set the behavior to be either Use as a regular Digital Input or to Start flowmeter on rising edge and stop on a falling edge or to Toggle the end valves with a rising and falling edge.
Other
This section allows you to configure the External Control Valves register to be either Software control or External control via the screw terminals.
Save
At the bottom of the GUI, there are 3 buttons:
Save configuration- Saves the current configuration to the device.Save configuration permanently- Saves the current configuration to the device and makes it the default configuration.Reset to defaults- Resets the configuration to the default values.